How I used Caddy Proxy to publish this blog before migrating it to GitHub Pages
Before migrating this blog to GitHub Pages I used this Caddy Proxy add-on on Hass.io to help me publish it.
When using Caddy Proxy, there is no need to worry about certificates in the configuration.yaml file, it takes care of that automatically. Just let Home Assistant run on the default port (8123).
As I don’t have a static IP on my internet connection I had to use the DuckDNS add-on to translate my dynamic IP address to a hostname.
The first step was to create an account and a domain on the DuckDNS website.
After that I copied the domain and token to the DuckDNS add-on Config, saved and started the add-on.
DuckDNS add-on Config example:
1
2
3
4
5
6
7
8
9
{
  "lets_encrypt": {
    "accept_terms": true,
    "certfile": "fullchain.pem",
    "keyfile": "privkey.pem"
  },
  "token": "sdfj-2131023-dslfjsd-12321",
  "domains": ["my-domain.duckdns.org"]
}
Time to edit some DNS entries.
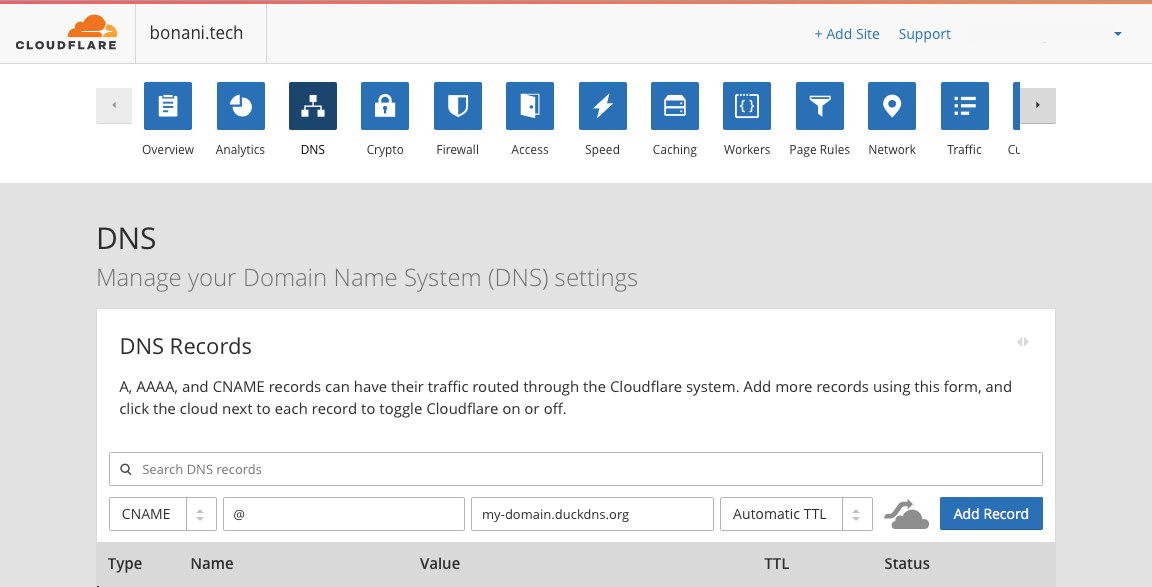
I use Cloudflare to manage my domain. All I had to do was add a CNAME record pointing the root of my domain (@) to my DuckDNS address.
I don’t like NAT Reflection/NAT Loopback/NAT Hairpinning, so I created an internal DNS zone to be able to access the blog in the LAN.
I set up a forward on ports 80 and 443 to the IP address of the Caddy Proxy (in this case the same IP of my Home Assistant install) in my router.
I also set up the Caddy Proxy add-on like below:
1
2
3
4
5
6
7
8
9
10
11
12
{
  "homeassistant": "hassio_hostname",
  "vhosts": [
    {
      "vhost": "bonani.tech",
      "port": "8081",
      "remote": "10.10.10.10"
    }
  ],
  "raw_config": [],
  "email": "user@email.com"
}
Then I installed WordPress on port 8081 (because it was running on the same server).
1
docker run --network=bridge -p 8081:80 -v /opt/wordpress/html:/var/www/html --name wordpress -d wordpress
And VOILÀ!
